[Drupal Theming] How to convert a PSD/HTML design to a standard Drupal theme?
Drupal is an extremely flexible framework that you can manipulate in multiple ways. In Drupal, the theming is the final phase in the process of generation of dynamic web pages. It converts the data from PHP objects and arrays into HTML markup and CSS styles. Read on to know how to convert a PSD/HTML design to a standard Drupal theme
This is the HTML design we are going to convert to a Drupal theme using 960 grid system
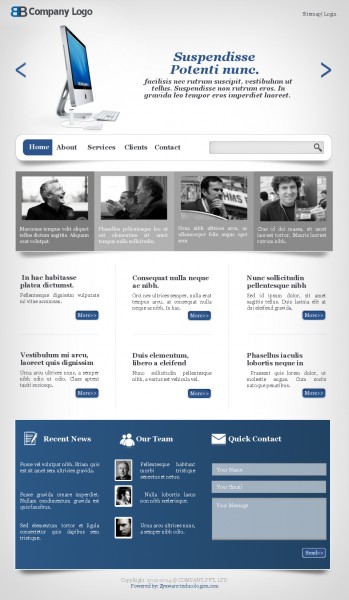
To convert this template to a Drupal theme we have to create a .info file which will include all the styles, JS and regions of the theme and the page.tpl.php file for the pages of the template and page--front.tpl.php for the front page of the template.
There are two options to enable the 960 grid system in our theme:
1, Download the 960 basetheme from http://drupal.org/project/ninesixty and add it as basetheme in .info file, also make sure to enable it in Drupal.
2, In the second option, there is no need to to add 'ninesixty' as the basetheme. You just have to copy the css files and add the css links in .info file. This option would be more comfortable, since there is no need of downloading and enabling any theme as basetheme. Here is a sample info file
name = Business blog
description = A flexible, recolorable theme with many regions.
screenshot = screenshot.png
package = Core
core = 7.x
base theme = ninesixty

regions[header] = Header
regions[primarynav] = Primarynav
regions[search] = Search
regions[featured-thumbs] =  Featured-thumbs
regions[footer] = Footer
regions[copyright] = Copyright
...
Then we have to add the regions of the sections. You can see that we have added six regions for my theme. We can add different blocks/contents to these regions. After specifying the regions we can start to make the tpl files for our Drupal theme.
If you need a customized index page we have to create page--front.tpl.php and for all the pages we have to create a single page.tpl.php.
We can also design specifically for each section in the page.The description is shown below.
These are the .tpl files handles different sections of the theme.
- page.tpl.php – Common for all page
- front-page.tpl.php – Only for front page
- block.tpl.php - Blocks of the pages
- comment.tpl.php - Comments
- forum.tpl.php – Forums
Pages
- page-node-edit.tpl.php
- page-node.tpl.php
- page.tpl.php
Boxes
- box.tpl.php
Nodes
- node-type.tpl.php
- node.tpl.php
Comments
- comment.tpl.php
- comment-wrapper.tpl.php
Blocks
- block-module-delta.tpl.php
- block-module.tpl.php
- block-region.tpl.php
- block.tpl.php
The Drupal theme directory path is
sites/all/themes/themename.
Notes
- Definitions, including regions and style sheet file names are placed into a .info file.
- The logic and "decision making" are placed into a template.php file.
- HTML markup is placed into template files ending with .tpl.php extension.
- Styles are placed into Cascading Style Sheet files.
STEP-I
In the page--front.tpl.php we add the same HTML and CSS but without the contents or menu. We can add that in Drupal.
We have to
<?php print render($page['content']); ?>add this code where we want to print the required content and we have to use the PHP if condition, if you want to enable or disable the content. Have a look at the code.
<?php if ($page ['content']): ?>
  <?php print render($page['content']); ?>
<?php endif; ?>
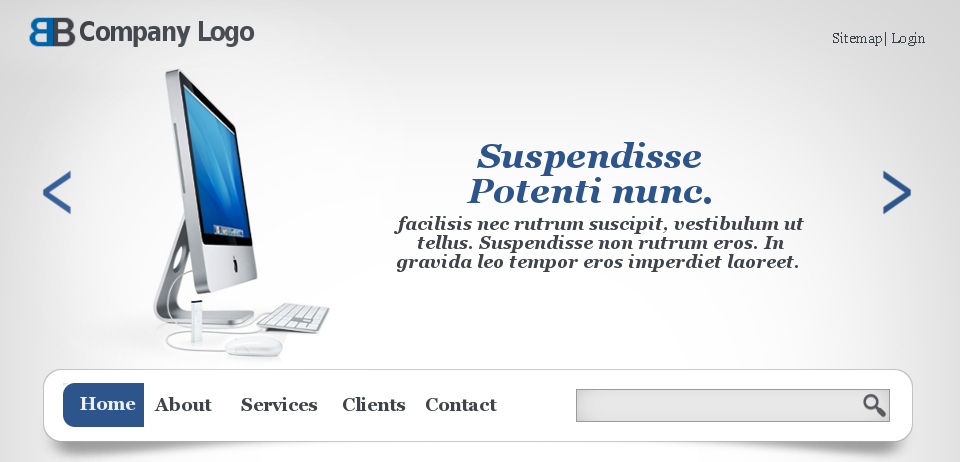
To make this header section we have to print the logo and login section on top.
So the code for logo will is as folows,
<?php if ($site_name): ?>
 <a href="<?php print check_url($front_page); ?>" title="<?php print t('Home'); ?>">
    <img src="<?php print $logo; ?>" alt="<?php print $site_name; ?>" /> </a>
<?php endif; ?>
and the login area in a specified area as shown below. So the login region will be printed inside the nested class called 'grid-8'
<?php if ($page ['login']): ?>
    <?php print render($page['login']); ?>
<?php endif; ?>
STEP-II
The primary navigation and search regions are nested in grid-12.
<div class="grid-12  main_nav">
  <?php if ($page ['primarynav']): ?>
      <?php print render($page['primarynav']); ?>
  <?php endif; ?>
</div>
The search region code look will like this,
<div class="grid-12  main_nav">
<?php if ($page ['search']): ?>
  <div class="grid-5">
    <?php print render($page['search']); ?>
  </div>
<?php endif; ?>
</div>
STEP-III
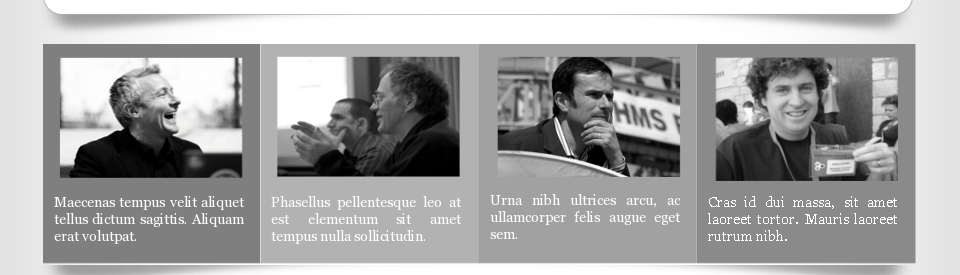
To theme this area we have a region called featured-thumbs. We can add four blocks and images in this region
<div class="grid-12 alpha omega">
  <?php if ($page ['featured-thumbs']): ?>
    <?php print render($page['featured-thumbs']); ?>
  <?php endif; ?>
</div>
STEP-IV
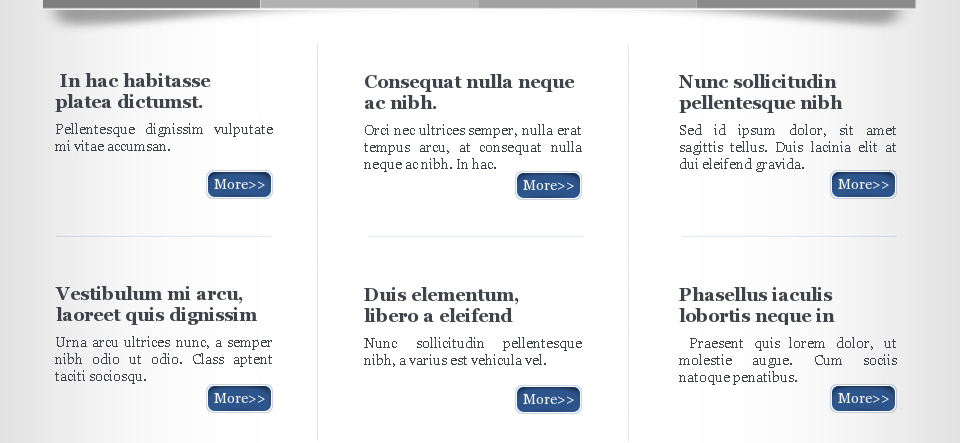
We can see six articles in the above section. We have a content region to place these articles. Now we have to modify the styles to get the articles aligned similar to the theme.
For example:
<?php if ($page ['content']): ?>
  <?php print render($page['content']); ?>
<?php endif; ?>
STEP-V
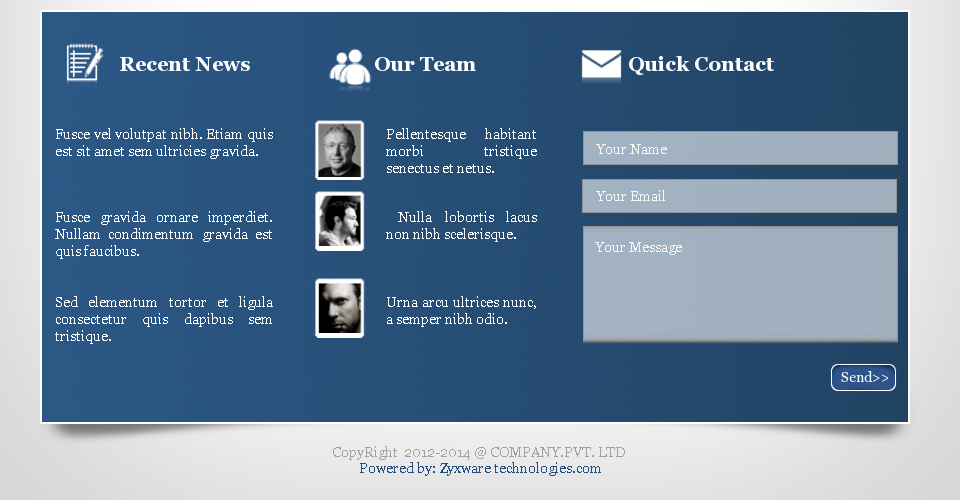
Finally, we have a footer section. In the footer section we have 2 regions. That is the footer region and copyright region. In the footer region we can add three blocks like the design. To get a styled form inputs like the design, you have to style the footer section form inputs.
<div class="grid-12 footer_top">
  <?php if ($page ['footer']): ?>
    <?php print render($page['footer']); ?>
  <?php endif; ?>
  <?php if ($page ['copyright']): ?>
    <?php print render($page['copyright']); ?>
  <?php endif; ?>
</div>
When developing your page design and layout in Drupal you may choose to start with a downloaded Drupal theme in the beginning. You can get Free Drupal themes from site. http://freedrupalthemes.net/ If you are new to Drupal, the easiest approach is to start with a Drupal theme and customize it as needed.