How to set different presets for landscape and portrait images inside a slideshow
While resizing an image, the important point that we should take care is, the image dimension. Image dimension is basically the width and height of an image. It should be kept as in the same ratio of the original image while resizing, if you want your image to be distortion free. ie, the aspect ratio (width:height) of the original image must be same as the aspect ratio of the re-sized image.
If you are using an image editor like gimp, then you don't have to worry about aspect ratio, because we can re-size any image by setting width or height, and can select interpolation and gimp will handle the rest. For example if you have an image with 1024 width x 768 height, which is a landscape image, and if you set width as 800px then gimp will set the height to 600 px to maintain aspect ratio, it is 4:3. But if you are dynamically trying to scale your images on your website, you will have to go through a lot of things to scale image without changing aspect ratio probably by using some interpolation algorithm based on the context.
We had a requirement to add a slideshow in a website. The challenge we faced was that the contents which were provided included landscape and portrait images. If we were to use these images directly, then it will definitely show the irregularities of the images, while switching. But as we were using Drupal 6, we solved this issue with a set of modules and configurations.
Modules that helped us includes:
Using the above modules, we created an Image preset and this helped us to solve our issue. I am listing here the steps to be followed to create the presets
Steps to add separate presets for landscape and portrait images.
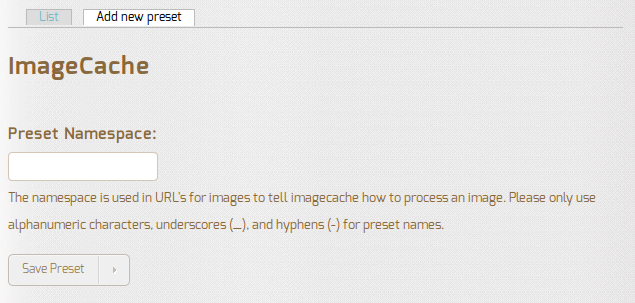
- Select Site building->Imagecache-> Add new preset.
- Set a preset name for landscape images and save preset.
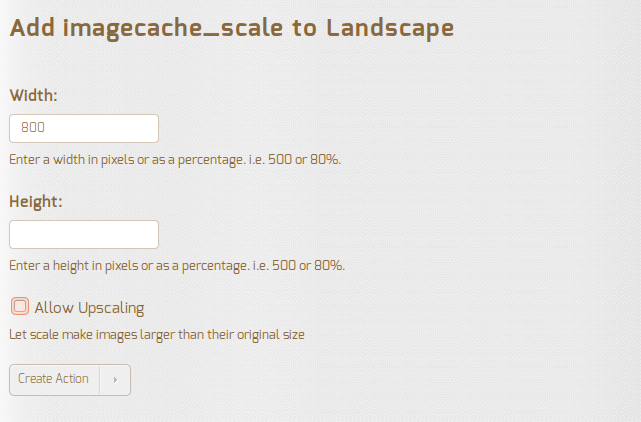
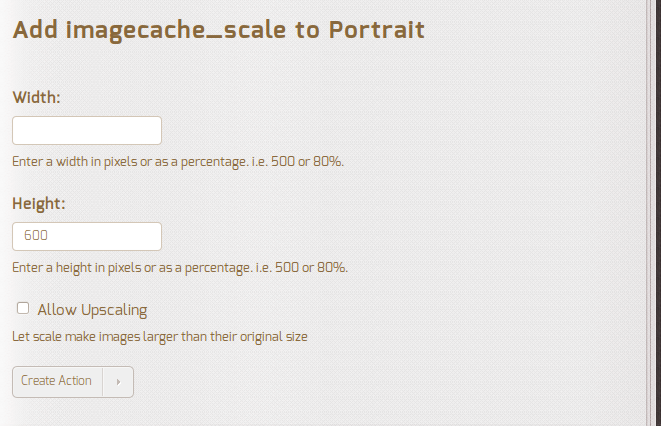
- In the resulting page you could see a list of actions. You can select "scale" action. It will resize the image maintaining the aspect ratio and only one value is necessary. While adding scale action for landscape images, set only the width.
Then create a preset for portrait image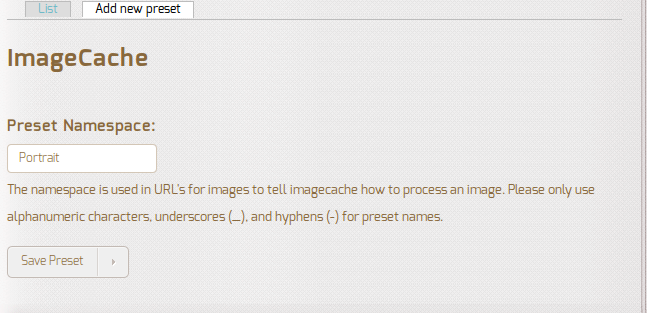
Save preset and add scale action, as the image is portrait set only the height


Steps to add preset with aspect switcher and define canvas actions.
- Create a preset to add aspect switcher(slideshowcolorbox.png).
- Select action, "add aspect switcher". In this page, select those presets we have created for landscape and portrait images

- select the preset name and click on new action.
- Select add canvas action.
- set width and height of the canvas and select X offset and Y offset
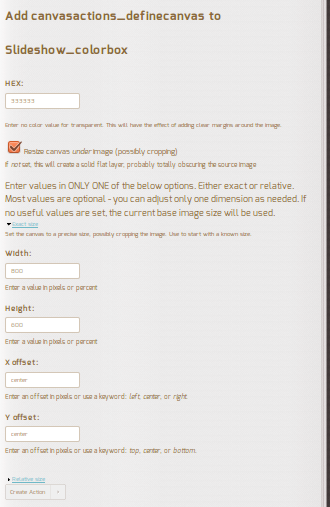

But we have one more challenge which I had mentioned earlier. As we are displaying the images as slideshow inside a colorbox, switching between images will display the irregularities in slideshow. To prevent this we have to set a canvas action for the last preset, that is for the preset for which we had added the aspect switcher. For this:

we had used the following code snippet to apply image cache preset.
<?php
//Get image path
$image_path = $node->field_image[0]['filepath'];
//Get the file system location of the image created.
//'Slideshow_colorbox' is the preset name with aspect switcher and define canvas actions.
$slideshow_image = imagecache_create_path('Slideshow_colorbox', $image_path);
$output = '<div class="main_image-colorbox">' . '<img width="800px" height="600px" src="/'. $slideshow_image .'"/>' . '</div> ';
print $output;
?>
Hope this Helps.