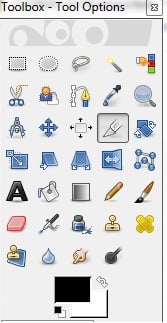
A reference to some of the basics in Gimp
Reporting the identified bug to the developer is the first and foremost task of a tester. The tester should report the bugs in such a way that the developer can make out the bug from the report, without any further queries. For this, the tester should include every minute details of a bug in the report he/she prepares. Sometimes you may find it difficult to report bug with mere words. At this point, the importance of screen-shots come into play. In Zyxware we use Gimp, a free and open source software for editing the screen-shots. This article is meant for users who are getting used to Ubuntu and in search for a start up guide/basic steps to use the gimp for editing your screen-shots. Read on the following steps:
- First take screen-shot of the required page using PrtScn key in the keyboard.
- Open it with gimp.
- First of all, we need to remove all the unnecessary things in the picture. Here we use the crop tool. The crop tool is highlighted in the attached reference image
 . Select the required field using the crop tool and press enter. Your original picture gets reduced to the field you selected leaving the unnecessary portion.
 - In certain situations, you will need to highlight certain portions (like alignment issues or image cropping off etc ) of your scree-nshot. To highlight a certain portion of your picture, select the portion using the Rectangle Select Tool. You may also change the colour accordingly. Then navigate to Edit >> Stroke selection. You may change the line width and pattern accordingly. After that click Stroke button.
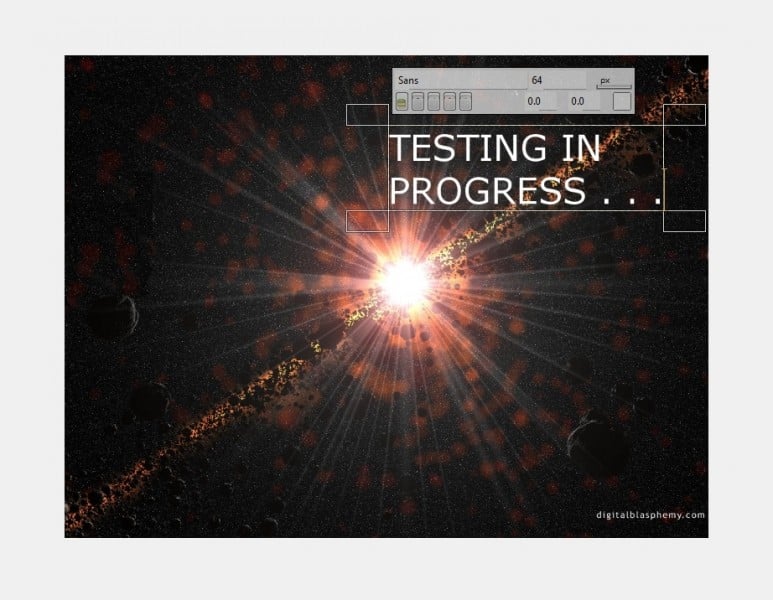
- If you want to insert text into your image use the text tool represented by 'A'. Select required field using the above mentioned tool. Type your text in the text in the selected field. You may also change the font type, size and/or colour. Refer
- If you need to draw arrow, select the pencil tool. Click on the portion of the image where you need to draw the arrow >> then press shift key and drag the mouse till the expected end of the arrow >> click the mouse. Here you can select the color, scale for the arrow.
Refer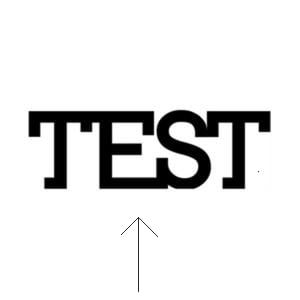
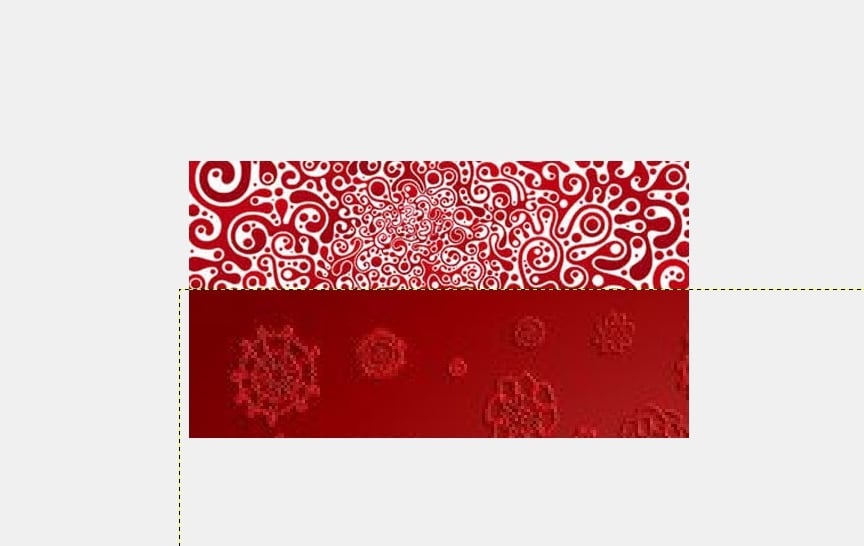
- comparing two images using gimp. You can open the new image into your workspace using File >> Open as Layers. Use the Move tool to see both the images on the same workspace. You may compare the images and edit them simultaneously on a single workspace. Refer
The screen-shots can be made more and more information conveying. Always keep in mind, the more simple and understanding you make the bug report, the more you save the time of your developers. I hope this article helps you. Do contribute your suggestions using the below comment box. Have a happy and interesting testing:)